How Doming Works

How to Make Domed Decals? - Check Out the Whole Process
You know domed decals, those slick stickers with a clear dome over top that has a slight magnifying effect on the graphic? Some are flexible, some are rigid, but most of them are highly durable and steadfast once stuck. How to make domed decals from the scratch?
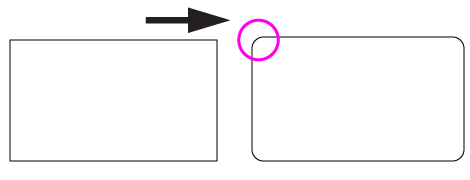
First, a couple of artwork guidelines. When it comes to domed decals, sharp corners and tight inside curves can be problematic - or simply impossible.

Cornered shapes, like rectangle or squares, should be rounded with an 0.125” corner radius.
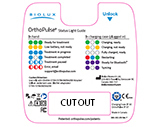
Special custom shapes and cut-outs (for things like ports on consoles) are doable; however, it’s a good idea to send us the artwork for review to, so we can advise on any adjustments that may be needed to accommodate the doming process.
Doming Process: Decals & Curved Surfaces
How to make domed decals? Make sure you test samples first! A flexible domed decal with a strong adhesive may work around a contour, but it’s not recommended because the doming material really wants to rebound to its flat shape.
Next, you use a durable synthetic substrate, like a vinyl stickers or polyester, and print the decal on a wide format press so it can be cut down into flat sheets. You don’t want to start with decals that have been produced on rolls because the curvature of the liner could create issues for the doming material. You can also dome screen printed decals for extra durability, but it is a more expensive product and can incur more-than-average waste because screen printed inks can interfere with the doming material and cause overflow or underflow.
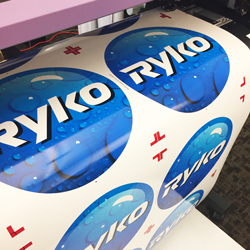
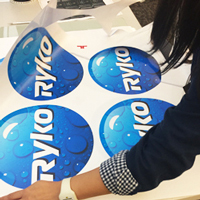
After the decals are printed, the big sheets are cut into smaller sheets to fit within the size of the doming plates.
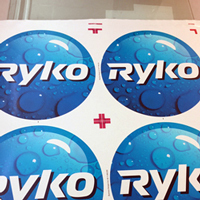
These sheets are then weeded, which is the removal of extra material around the decals, so it’s just the decals on the backing paper.
As it's done, the doming process is moved to the doming lab!
How Doming Works? - Lab Procedures
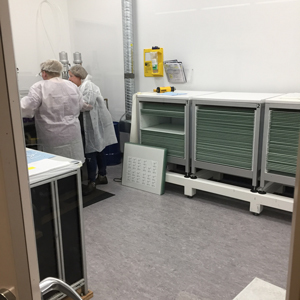
What is doming? The doming lab is a ventilated clean room that is temperature and humidity regulated. The doming technician wears a lab coat-like garment over their clothes, gloves and a fancy hairnet. Keeping this space free from dust and particulate matter is paramount to producing flawless domed decals. There is a sticky mat at the entrance to remove dirt from shoes, which is what flypaper would probably feel like if you were to walk across it.
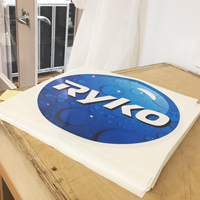
How doming works? Depending on the artwork, the doming technician may wipe the sheeted decals with an oiled cloth to promote resin flow. The decal sheets are pressed into place on the doming plates, and then the technician selects the appropriate nozzles and writes the dispensing program for the doming machine. Each program is unique and based on the size and shape of the decal, the space between decals on the sheet, the number of decals up on the sheet and so on. The accuracy of the program is critical, as one miscalculated decimal point can make a big mess once the machine starts to dispense doming material!
Once the program is written, the machine is calibrated, and the plates are positioned under the nozzle dispensing unit, we’re ready to start doming. The doming material is dispersed as a two-part chemical compound consisting of isocyanate and polyurethane that starts as liquid, but once combined with its counterpart begins to cure into a gel-like substance almost instantly. The nozzle (or nozzles) distributes the precise volume of mixture over each decal and moves quickly across the sheet with its mechanical arm. The liquid material flows across the decal, but stops at the edges because of surface tension.
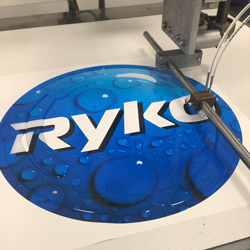
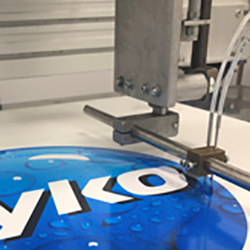
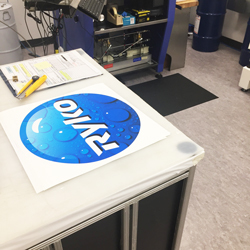
If too much chemical is dispensed for the surface of the decal, the tension will break and the liquid will overflow, bleeding into other decals or off the liner and creating a mess. If there isn’t enough chemical, it won’t flow all the way to the edge and the decals will not be completely domed. The technician inspects the decals and then carefully lifts the plate and inserts it into the oven, which is a specially-designed cabinet with inside brackets on either side to rest the plates on. It’s very important that the ovens are absolutely level and kept immaculate.
The final step of the work
As mentioned earlier, the compound begins to cure almost immediately so after a few plates are inserted in the oven, the technician will go back and check them to make sure that no problems are occurring.
The plates are left in the ovens to cure for about 12 – 16 hours and then removed to be quality controlled. The domed decals are inspected for any flaws, such as dust or bubbles in the doming resin, or blemishes on the print.
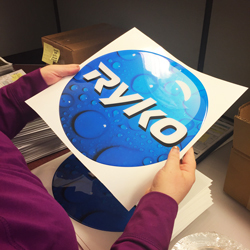
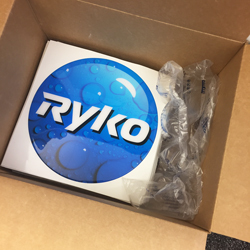
After careful review, the domed decals are counted, and provided there are enough to fulfill the order, they are packaged and sent off to the shipping department.
If there was a problem and a lot of waste occurred, it’s time to investigate the problem and return to step one – but thanks to our savvy production team, that doesn’t happen very often!